
Mythos: Cap, Step by Step, Part 6
Friday, August 22, 2008
Labels: Mythos / Photoshop / Step by Step / Technique
Post-production... it's a necessary evil. Since I scan all of my own artwork, I have to know Photoshop pretty well (or at least aspects of it) in order to create a file that will reproduce faithfully. I've learned a lot over the years, but it's been a process of trial and error.

The benefits of scanning your own artwork are well worth the time it takes. First and foremost, your originals never leave your hands and therefore are not at risk of being lost, damaged, or sent away to the wrong person. These things happen... sometimes to me, but not anymore. Additionally, you get a second chance at correcting any mistakes before you send it off. This also happens to be a disadvantage.
Sometimes I find myself — and I'm not alone here — spending way too much time agonizing over the most trivial details and color balances, when the end result is not of much importance. Often, I will let a piece sit around for a day before I scan or retouch it. This gives it a freshness to my mind's eye that lets me zero in on what's important.
But enough introduction. What do I do once I've got the image scanned? Actually, let's start with how I scan it. Someday I'll be able to afford the Epson 10,000 XL scanner, but for now my letter-sized scanner will have to make do. I scan the page, which is as wide as a letter-sized paper is long, in 3 sections. It works for the most part, but the edges warp and dim as they exceed the prescribed boundaries of the scanner. Luckily for me, the newest version of Photoshop, CS3, has an improved Photomerge function that has made my life much, much easier.
You can find this modern miracle under File> Automate> Photomerge. The previous version was almost worthless as it made no attempt at warping geometry to line up, let alone color matching. Thank you, Adobe.
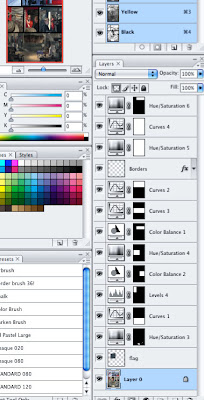
Once in the computer, I make sure all my specs are correct, i.e. dimensions, resolution, and color gamut. I then create a separate layer for borders. The borders are created with a square brush tool, while holding down the shift key, which gives me a straight line. In addition to that, using the "Layer Style" palette, I add a black stroke to the outside of my borders, usually around 8 pixels wide. In this case, it makes no difference since the border and gutter are the same color, but it matters on other pages.
Then comes the hard part, which I've shown below. I use adjustment layers to tweak everything from value to saturation. Often, one all encompassing adjustment is not enough, so I use layer masks to isolate individual panels. I'm not going to go into the details of exactly what I do, but if anyone has any specific questions, feel free to ask. I'll gladly answer in the comments, or possibly get an idea for a future post.
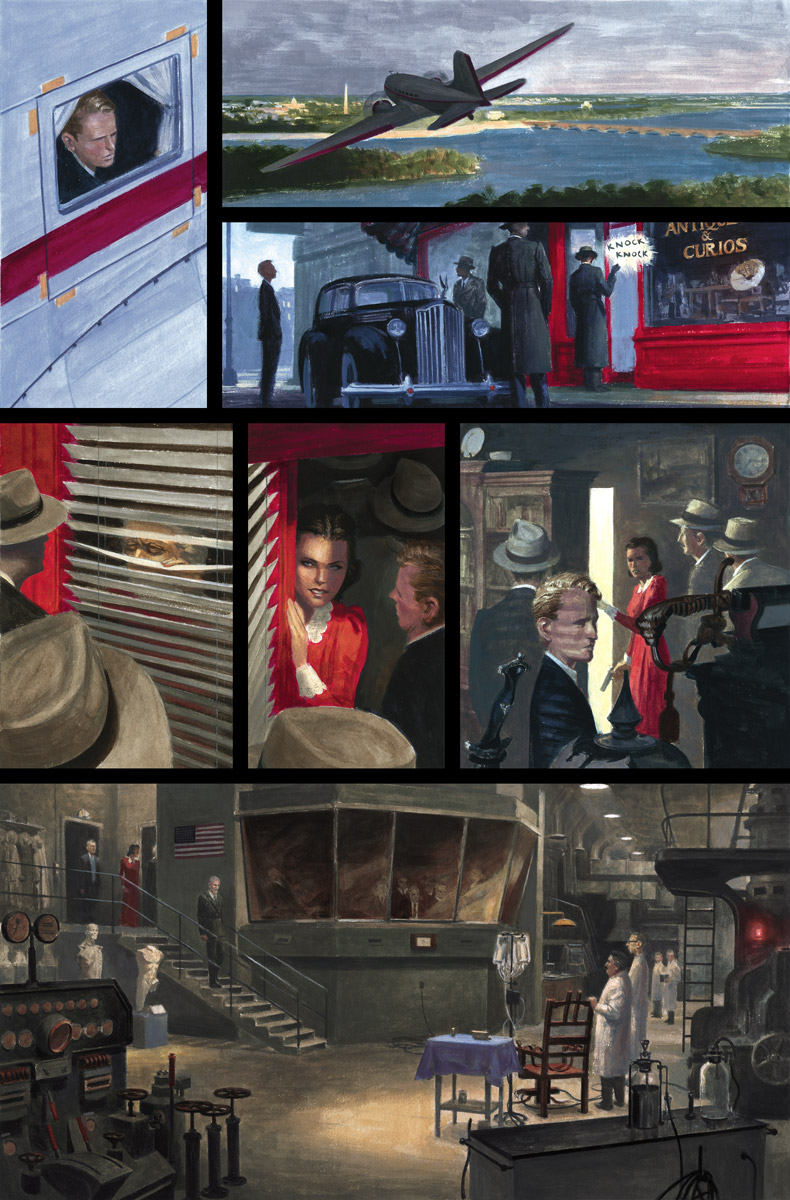
One other tool I should mention is the "Liquefy" filter which I use to gently nudge pixels around. This is especially helpful on faces, where the slightest change can result in a different expression. I also utilize this in the beginning stage of a color study, which I'll show in a future post. With this page, I used it to correct distortion in the woman's face and reduce the size of Steve Rogers ear (it looked good in the pencil drawing, but paint can make cartooned exaggeration look awkward).
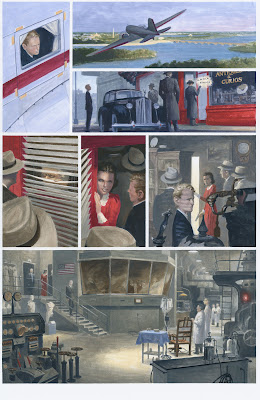
And so here it is, the final result. I've included the original scan to show you just what a dramatic difference Photoshop can make. There were several color corrections that I wanted to make in the painting, but I simply ran out of time. Luckily for me, I live in the 21st century and can use advanced tools to make myself look better.
I hope you've all enjoyed this in-depth look at the creation of a painted page. And again, if it's sparked more questions than it has answered, please feel free to ask.

The benefits of scanning your own artwork are well worth the time it takes. First and foremost, your originals never leave your hands and therefore are not at risk of being lost, damaged, or sent away to the wrong person. These things happen... sometimes to me, but not anymore. Additionally, you get a second chance at correcting any mistakes before you send it off. This also happens to be a disadvantage.
Sometimes I find myself — and I'm not alone here — spending way too much time agonizing over the most trivial details and color balances, when the end result is not of much importance. Often, I will let a piece sit around for a day before I scan or retouch it. This gives it a freshness to my mind's eye that lets me zero in on what's important.
But enough introduction. What do I do once I've got the image scanned? Actually, let's start with how I scan it. Someday I'll be able to afford the Epson 10,000 XL scanner, but for now my letter-sized scanner will have to make do. I scan the page, which is as wide as a letter-sized paper is long, in 3 sections. It works for the most part, but the edges warp and dim as they exceed the prescribed boundaries of the scanner. Luckily for me, the newest version of Photoshop, CS3, has an improved Photomerge function that has made my life much, much easier.
You can find this modern miracle under File> Automate> Photomerge. The previous version was almost worthless as it made no attempt at warping geometry to line up, let alone color matching. Thank you, Adobe.
Once in the computer, I make sure all my specs are correct, i.e. dimensions, resolution, and color gamut. I then create a separate layer for borders. The borders are created with a square brush tool, while holding down the shift key, which gives me a straight line. In addition to that, using the "Layer Style" palette, I add a black stroke to the outside of my borders, usually around 8 pixels wide. In this case, it makes no difference since the border and gutter are the same color, but it matters on other pages.
Then comes the hard part, which I've shown below. I use adjustment layers to tweak everything from value to saturation. Often, one all encompassing adjustment is not enough, so I use layer masks to isolate individual panels. I'm not going to go into the details of exactly what I do, but if anyone has any specific questions, feel free to ask. I'll gladly answer in the comments, or possibly get an idea for a future post.

One other tool I should mention is the "Liquefy" filter which I use to gently nudge pixels around. This is especially helpful on faces, where the slightest change can result in a different expression. I also utilize this in the beginning stage of a color study, which I'll show in a future post. With this page, I used it to correct distortion in the woman's face and reduce the size of Steve Rogers ear (it looked good in the pencil drawing, but paint can make cartooned exaggeration look awkward).

And so here it is, the final result. I've included the original scan to show you just what a dramatic difference Photoshop can make. There were several color corrections that I wanted to make in the painting, but I simply ran out of time. Luckily for me, I live in the 21st century and can use advanced tools to make myself look better.

I hope you've all enjoyed this in-depth look at the creation of a painted page. And again, if it's sparked more questions than it has answered, please feel free to ask.
Thanks so much for this it really enlightens me on many aspects of your process that I can now take and implement into my own.
ReplyDeleteBefore I was scared to "over Photoshop" my work, I didn't know whether or not the pros used it to correct color/anatomy/levels mistakes etc. post painting. I didn't want to be cheating or taking an easy way/incorrect way out. I thought what you guys did on that final painted page was it and you didn't change much outside of correcting the scanning process a bit. But I'm glad to know that masters such as yourself do indeed use it when things just don't look right at the end, and now I won't feel bad doing it as well.
Yeah, Gregory, don't sweat it. Most all of the pros I know use it in some capacity. However, there is a trick to knowing whether or not you are "cheating." Simply ask yourself, "Could I do this without Photoshop?" If the answer is "no," that's okay, just be aware that you've got more to learn.
ReplyDeleteI know this post is many years old by this point but I still gotta thank you for it. I´m in the process of doing my first comic (to be published) and I have a deadline and I have never ever done a comic before. So much for expectations.
ReplyDeleteThat said, this is gold for me. So thank you!
The thing I worry about the most right now is probably the speech bubbles etc. I have decided on doing part traditional and part digital (as in scan some I did traditionally for that panel and put them were I want them), I hope it won´t bite me later.
Thanks again for putting this up!
Helene, thanks for reading! Digital/traditional hybrids are the norm now... almost everything I do has aspects of both. Best of luck with your project!
DeleteAlways a pleasure.
DeleteAnd to think no one told me, I´m a desperate genius. I can totally justify this to my prof now.
Very good to know, thank you! :)
Aaand thank you!
Thank you Paolo for having taken the time to do this. I've been wanting to paint with gouache my comic ( amateur ) and hesitated on how to approach it, so it's a great help to see a pro doing it. Great post and wonderful artwork.
ReplyDeleteMy pleasure! My most important piece of advice? Finish a penciled and inked comic before you try a painted one. You'll thank me later, I promise :)
DeleteThanks so much for taking the time to do this series, very illuminating and interesting to see the process!
ReplyDeleteMy pleasure!
DeleteHey Paolo, this is a very useful post. I was wondering about the scanning process itself. Do you just do a raw scan or do you fiddle with any of the settings of the scanners software? I'm scanning some gouache covers myself and I'm still trying to figure it out.
ReplyDeleteI usually fiddle once (until I'm happy with the results) and then never touch them again. In general, I'm looking for the scanner to capture the most amount of information, so I fiddle with the levels until I can see the texture of the paint and paper, both in the lightest lights and darkest darks. I make most of my editing decisions later on in Photoshop.
Delete